Fritschi Xenic 10 Touring Bindings: Overview and First Impressions
In our roundup of the Best Tech Touring Bindings in 2019 we mentioned a new tech binding: the Fritschi Xenic 10. Fritschi was well known for years as the manufacturers of the ubiquitous Freeride frame touring bindings. But recently they’ve made waves with the Tecton and Vipec Evo touring bindings, which are hybrid tech bindings that ski extremely well.
The Xenic 10 is Fritschi’s first foray into the lightweight pin binding arena and one thing they definitely nailed is the lightweight aspect of it. We’ve had the chance to get a bit of time with these bindings both in the shop and on snow so read on for our initial thoughts.
Stats
MSRP: $429.95
Weight: 280 g / 9.88 oz (no brakes)
Brake sizes: 85, 95, 105 mm
Brake weight: ~40 g
Release Range: 4-10
Riser Levels: 2°, 11°
Length Compensation: 10 mm
Pin height delta (ramp delta): ~12 mm
BSL Adjustment Range: 25 mm
Buy Now: Backcountry.com, BlackDiamond.com, CrippleCreekBC.com
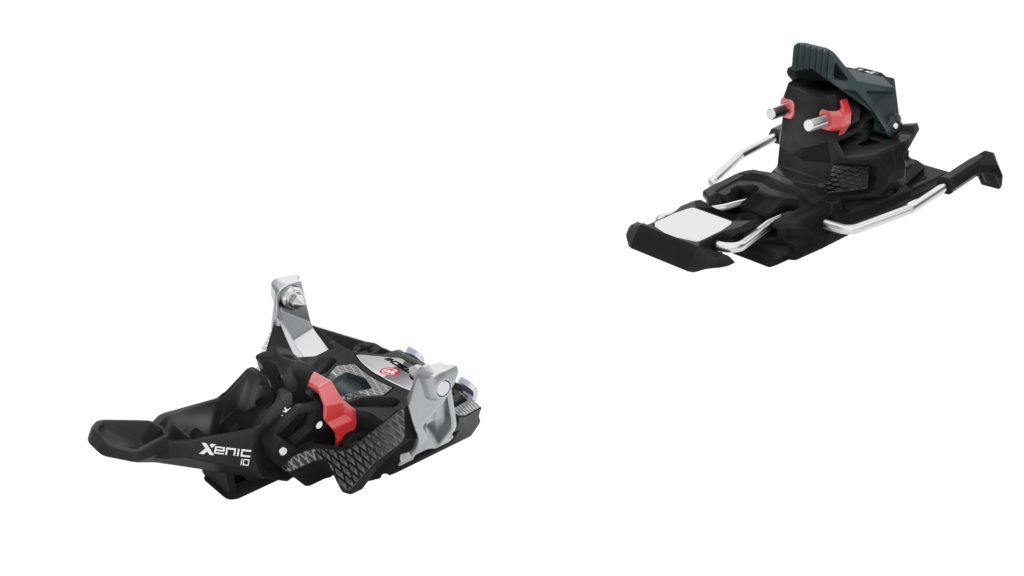
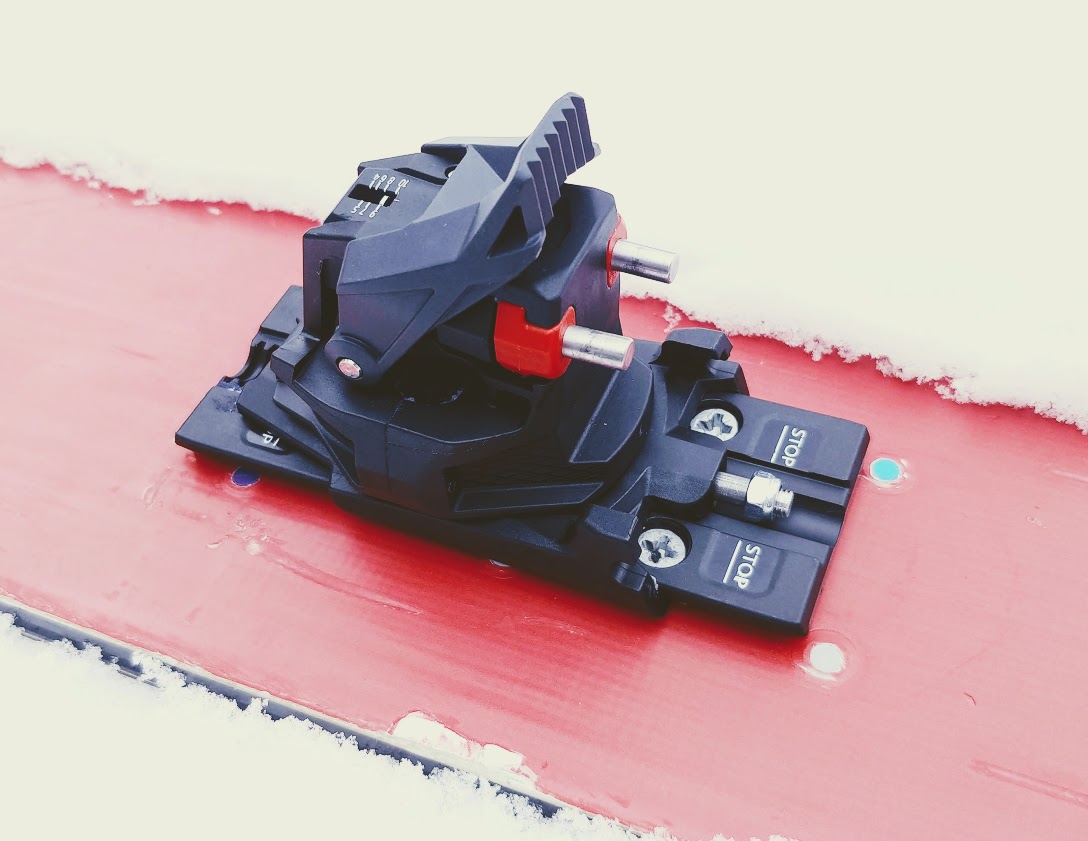
Toe Piece
The Xenic 10 toe looks somewhat similar to a ‘traditional’ tech binding with a set of pins and a toe lever to switch between ski and walk mode. There is a fair bit of plastic in both the heel and toe, but I trust that Fritschi’s materials engineers know what they’re doing. There are a few other subtle differences too. One is that the pins move only in a horizontal plane – most tech binding toe pins move to the side and slightly down at the same time. In theory this should make the toe less susceptible to pre-releases due to vertical forces.
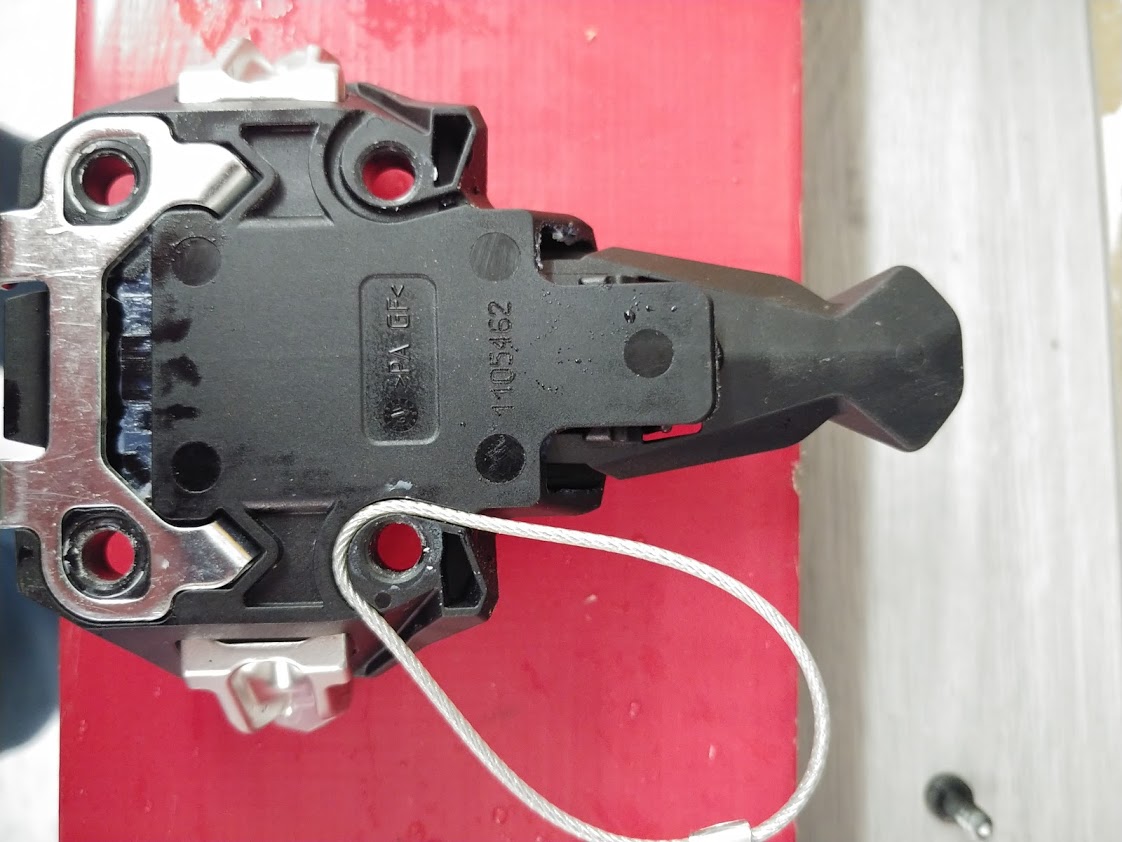
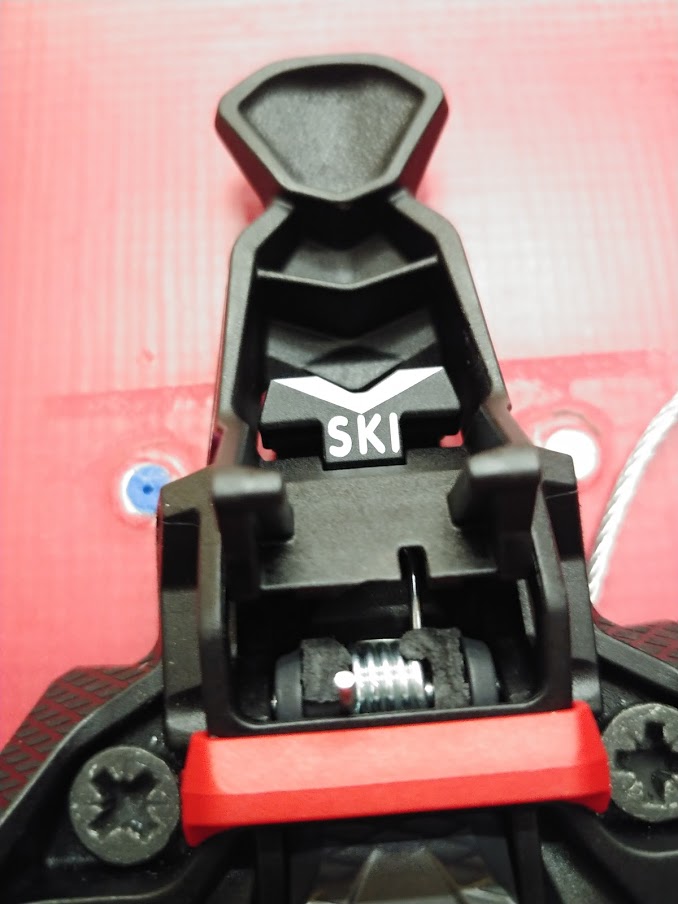
Another interesting feature is the forward fall trigger. This is a small black piece of plastic that sits in front of your boot toe. When skiing, if your boot heel releases upward, the toe of your boot will activate this trigger and release the toe wings. On the bench this works quite well and should allow for consistent forward fall releases…unless the black trigger breaks off. More on that below in the durability section.
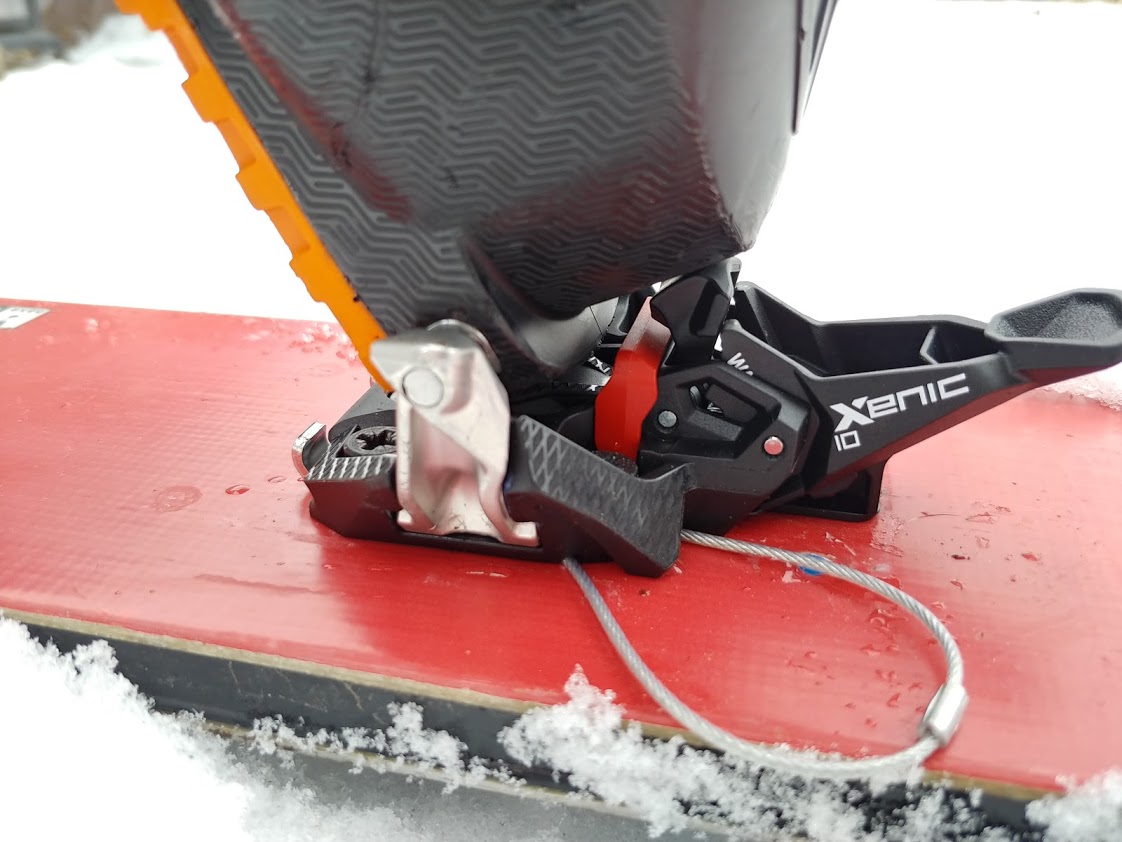
To make stepping into the binding easier, Fritschi has added a red ‘pedal’ (their words) to help align your boot before stepping in. In practice, this helps get your toes aligned, but the trigger plate is suuuuper sensitive, so I found myself snapping the toes shut before I was aligned. I’m sure this will get smoother with practice, and the sensitive trigger makes it really easy to snap in when you’re aligned properly.
On the bench, the ski/walk lever is super easy to switch back and forth. But with a boot clicked in it takes significantly more effort. It might ‘wear in’ over time, but right now it takes a pretty stout pull to move the lever to walk.
If you’re keen to use leashes, there is a channel under the front 2 toe screws to accommodate a leash loop. Make sure you get your tech to install this when they mount the bindings. It’s around 1.6 mm in diameter, give or take (1/16″ metal rope fit just great – that’s 1.588 mm). The crampon adapter also sits under the toe piece, and accommodates standard ‘dynafit’ style crampons.
Boot Compatibility
As you would expect, these are only compatible with touring boots with tech fittings. There is one exception – speed nose boots (like the Dynafit Hoji Pro Tour) are not compatible. I’ve heard rumors that if you remove the red alignment pedal they will work, but I can’t confirm. Try before you buy (or not…I’m not your supervisor).
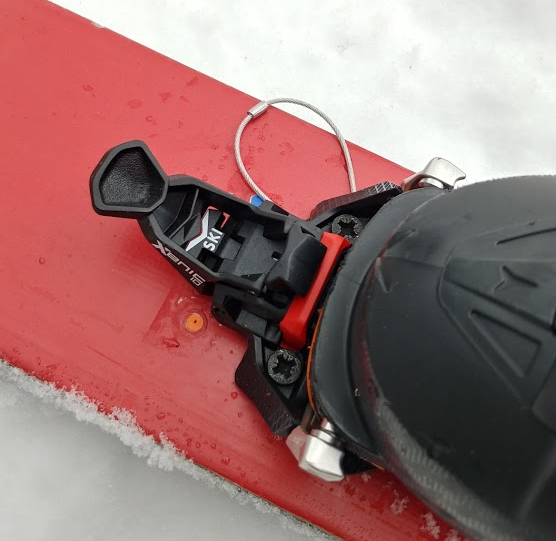
Heel Unit
For such a light binding, the heel unit is less minimalist than I expected. The pins are independent roller pins instead of the U spring found in many lightweight tech bindings (e.g. the Salomon MTN). The heel rotates in either direction to switch from tour to ski mode. With the release value cranked up it takes significantly more effort to turn the heel – lowering the riser for better leverage is helpful.
You’ll also find independently adjustable lateral and vertical release values (4-10 for both). They’re an odd screw head though – Pozi #2 (which isn’t a common bit to have). A small Phillips or flat head driver works just fine though – some better than others, so experiment to find a good fit. It seems like a bit of an odd choice by Fritschi, but it is what it is.
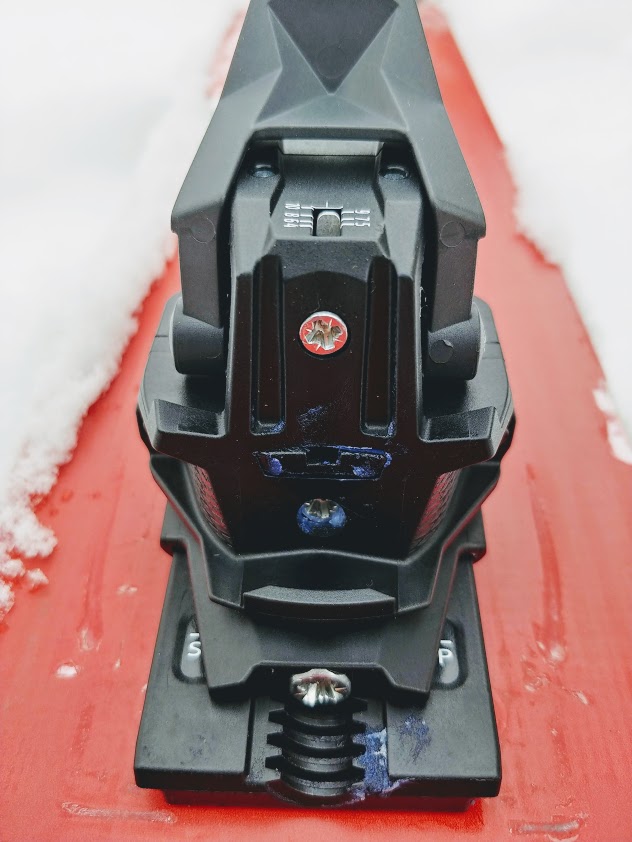
There is also ~10 mm of length compensation handled by a stout-looking spring under the binding. When adjusted for forward pressure, your boot will be 1 mm from the binding heel, which is pretty tight. There might be issues stepping into the heel if your ski is really flexed (your boot heel could hit the top of the heel unit instead of the pins), but I haven’t experienced this yet. In terms of fore and aft adjustment for different boot sizes, there is around 25 mm of travel, which is pretty good for a light tech binding.
Brakes
Fritschi is known to size their brakes generously. I fit a pair of 105 mm brakes on my 110 mm width skis without any bending. Generally the recommendation is to size down and bend the arms out (carefully) if you need to.
Attaching brakes to the Xenics wasn’t too bad, and Fritschi has a helpful video on their site that shows the process. You clip two plastic pieces to the brake arms while compressing them slightly and then clip that to the heel unit. The last part was a bit tricky and required a fair bit of pressure, but took less than a minute the first time.

Storing the brakes is super simple – stomp on them with the heel in tour mode or press them in place with your hand. It looks like they have zero chance of releasing while touring when the heel is rotated. Good news on that front.
Risers
Aside from a flat mode (Fritschi says 2° which is pretty close to flat) there is only one riser on the Xenics and it’s of middling height. If you spend a lot of time on super steep skin tracks you might miss having a ‘high’ riser. In my one day so far on these I didn’t find having only one riser to be too limiting, but did have a bit of trouble on one suuuuper steep skin track. On mellow tracks the riser was great.
On the plus side, the one riser is really easy to grab with either a pole handle or basket and feels really solid when in use.
Mounting pattern
Rumor has it the rear mounting plate is the same as the Vipec and Tecton, but there is some variation in the toe. Apparently the front 2 holes in the Xenic toe line up with the Tecton toe, but the rear 2 do not so you’ll have to drill some new holes if you plan on swapping. Definitely do some research on this front before committing.
Pin Height Delta
The difference in pin heights from heel to toe is around 12-13 mm, which is similar to earlier Dynafit tech bindings (like the TLT). This might result in too much ramp for those that like a flatter platform, but shimming the toe is always an option. This is definitely a personal preference thing, but the Xenics have a larger delta than the Tectons.
First Impressions in the Field
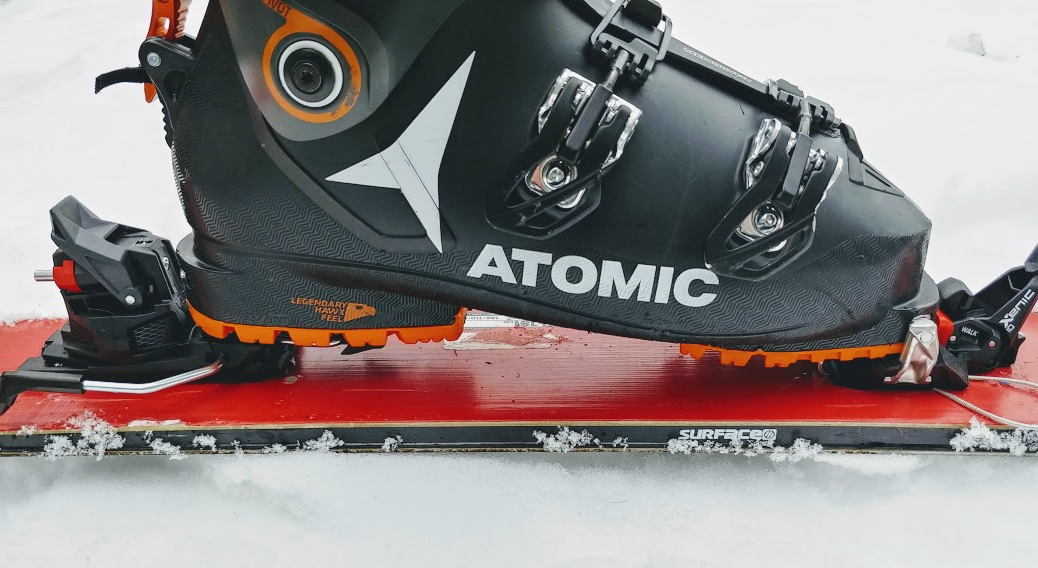
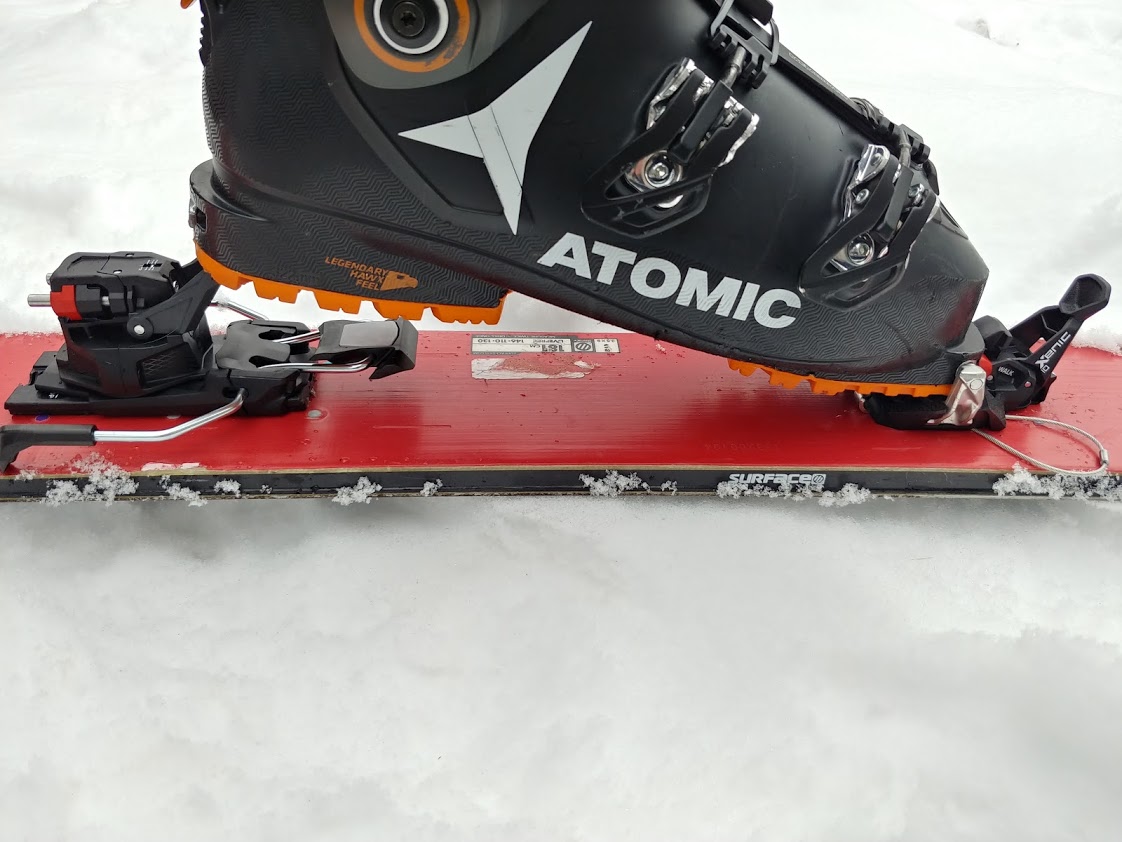
As expected, the Xenic 10 bindings feel quite light on the way up. Skinning in them was a pleasure. For this initial test I mounted them to an older pair of Surface Live Free skis which aren’t super lightweight (< 2 kg / ski) and are 110 mm underfoot.
As I mentioned above, the riser is easy to engage or disengage with a pole, but at points I missed having a higher riser. Steep skin track fans should keep this in mind. For the most part they were just fine, but we got onto one super steep skin track where I was missing a higher riser.
The ski/walk lever is similar to most tech bindings (pull for walk mode, push down with a pole to release. My initial impression is that the lever required a fair bit of force to lock it, but it may “break in” and become easier. We’ll keep an eye on this. When I got back to the truck, one toe took a LOT of pressure from my pole to release. I suspect it may have iced up a bit.
Stepping into the bindings in powder was slightly tricky, as the trigger is quite sensitive. I’m pretty sure it’s something I’ll get used to – the alignment is slightly different from what I’m used to (Dynafit Radicals).
Downhill Performance
As far as downhill performance goes, I don’t have a ton of feedback as we only got one powdery early season run the day I got out on these bindings. But I have no complaints. They felt very well connected to my boot (as tech bindings usually do) and I was able to pressure the front of my boots and drive my skis without any issues. No pre-releases, but again, I was in powder (there was some buried avy debris and rocks, but I managed to avoid them). For reference I weigh around 185 lbs without gear and was running the release values at 9.
Durability
There is more plastic in the Fritschi Xenic 10 than I was expecting, but I do trust that their engineers know what they’re doing. The Vipec Evo also has a fair bit of plastic, and it is a very well reviewed binding. We’ll have to get more time in the field on these to truly get a sense of how durable they are. I would hope that Fritschi field testers would have found any deficiencies in the design, but real world testing always introduces new problems so we’ll have to wait and see.
The Bad News
I did manage to break something on these the first day out…when I got back to the parking lot, I noticed one of the forward fall bumpers was missing. I don’t know exactly when it happened, but at one point skinning out I lunged to adjust one of my tail connectors. When in walk mode, the forward fall bumper moves freely when your boot hits it. I suspect that it may have iced up, not been able to move, and when my boot hit it with a significant amount of my weight, it broke.
This is a bit concerning. If the forward fall mechanism had been iced up when I was skiing down and I had a forward fall, would the binding have released or would the same breakage have happened? Hard to say. If it broke and didn’t release, the result could be a very awkward fall.
The Good News
In any case, Black Diamond is replacing the bindings with no questions asked. They’re currently in the mail on their way to the BD head office so it will be a few weeks before I get back on these bindings. The other good news is that this is FAR from a critical failure. If this happened deep in the backcountry it really wouldn’t be a big deal (I didn’t even notice until I went to step out of the binding).
Closing Thoughts
There is always risk in trying any piece of gear in its first year of release, and the Fritschi Xenic 10 is no exception. However, it looks to be a well designed touring binding – it’s super lightweight and dead simple to operate.
With an upper release value of 10, it’s probably better suited to lighter/less aggressive skiers but not necessarily. Smooth skiers can fare well with ‘lighter duty’ bindings too.
Even if this binding isn’t great for you, it’s awesome to see more competition in the lightweight tech binding arena. More competition should make this class of binding more affordable. I’ll keep you updated as I get more time on these this season. In the meantime, leave any questions or comments below.
4 thoughts on “Fritschi Xenic 10 Touring Bindings: Overview and First Impressions”
Ive had terrible durability experience with the Xenics. Currently on my third set of toe pieces, and this really is annoying because re-mounting on my skis always jeopardizes the mounting holes. They got stripped once and had to be heli-coiled. Anyhow, the toe bumper pretty much just fails on every toe piece on day one or within the first couple weeks. Locking into walk mode is almost impossible at worst, and pretty tricky at best. Also, the sensitivity of the step-in plate makes mis-aligned step ins very common. I really don’t like these bindings and am bummed my skis now have screw patterns for these. Should have gone with the Helio 200s. Much better.
Hi, I have a similar experience. I broke the bumper off first tour, as well. It was fairly cold with new snow, I believe it iced up. I am also having a really hard time locking the walk mode. It takes a great deal of force, to the point it feels like I am going to snap off the lever. I skied these bindings in less than ideal conditions at the resort to test them out, they ski great. Tour great as well, do wish they had the extra riser. I really hope Fritsch/BD has a solution. Nice write up.
Sorry to hear that Nate…it sounds like we share the similar feelings about the Xenics. I’m hoping that the lever ‘wears in’ over time, but I don’t know what, if anything, the solution for the bumper will be…I’ll update this if I hear anything from BD.
That would be great, thank you Mike. I am waiting for my local ski shop to hear from BD and see if they have any solutions. I did speak with folks at SkimoCo. They said they did a little dremmeling to the level and it works much smoother. Not sure if it effects the bumper operation.
Comments are closed.