Backcountry Skiing for Beginners: Gear Guide
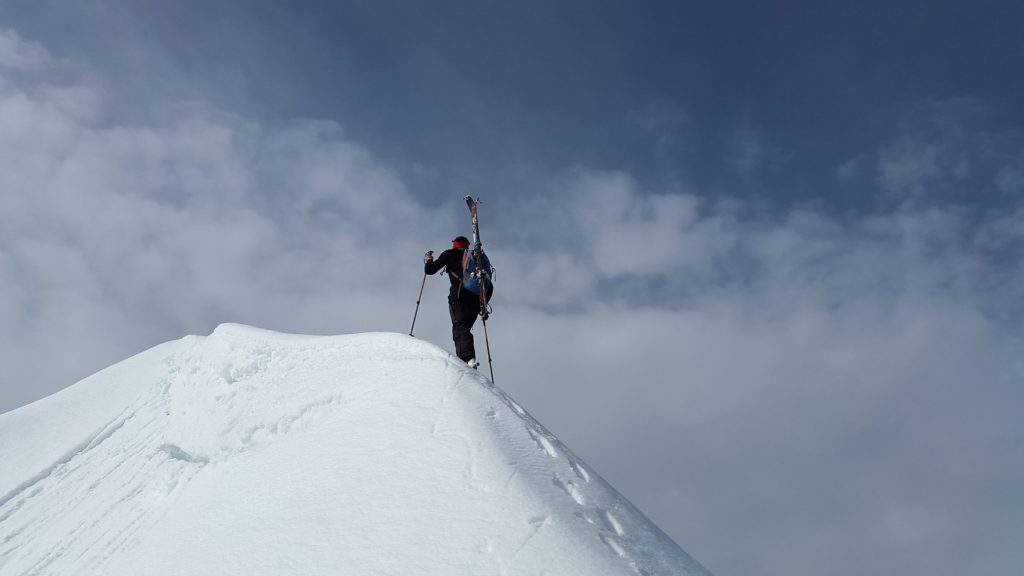
This backcountry skiing for beginners gear guide will provide you with a basic but thorough understanding of what you need to know to get started. Whether you’re an absolute beginner or a seasoned veteran, I hope there is something on this list that will help.
The intent of this gear guide is not to narrow down each piece of gear to one recommendation. It’s to give you an idea of what to look for when shopping/scrounging for gear. I’ll give you an idea of good and bad designs in each area.
If you’re new to the site, start with the ‘How to Start Backcountry Skiing’ intro and then flip back to this guide. It will make a lot more sense.
Renting vs. Buying
If you have the option to rent available to you, go for it! Buying all the gear for backcountry skiing is expensive, so if you can borrow or rent some items I would highly recommend doing so.
Until you get hooked on hiking for pow, it makes sense to save some money. Once you’re hooked, then you can start building up your gear inventory.
When renting, try and have someone experienced go with you to the shop to make sure the rental gear isn’t trash. I’ve seen skins that barely stick to skis go out as a rental before, so be aware. This isn’t common, but is something to keep in mind.
When you are ready to start buying gear, I would recommend starting with touring boots. Having rental boots that don’t fit very well can lead to blisters, sore feet and a ruined day in a hurry.
Another item that should be high on the list is your avalanche transceiver (or beacon). The reason is that you want to be intimately familiar with how your transceiver works so that using it in an emergency is second nature.
If you’re renting, be sure to get familiar with all of your gear before heading out. A practice beacon search is always a worthwhile exercise, even for experienced backcountry skiers.
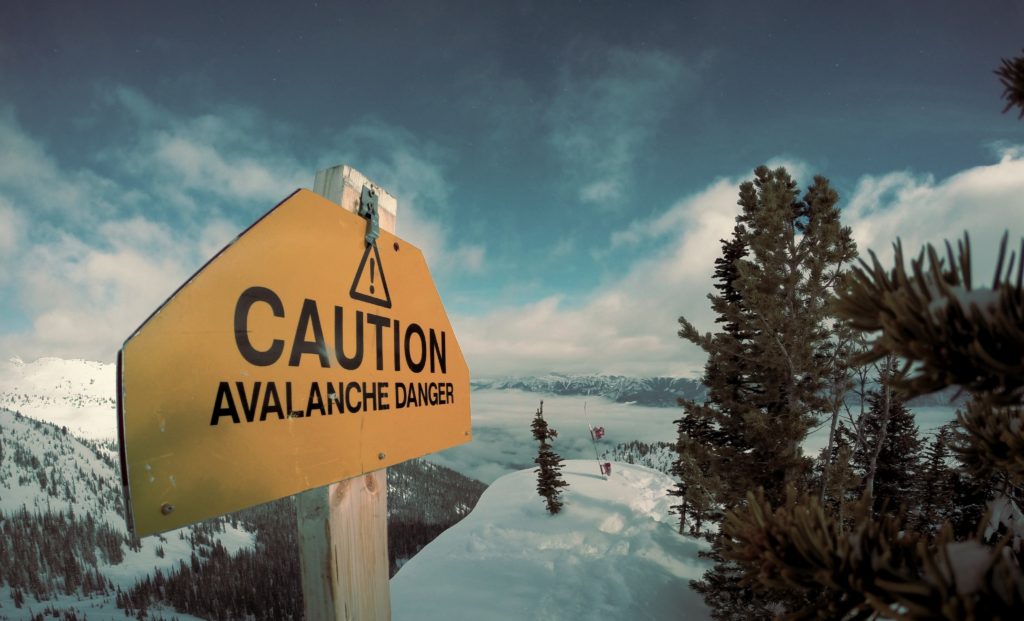
Avalanche Safety Gear
Since safety is your primary concern in the backcountry, let’s start with gear that will help you stay alive. Beacon, shovel, probe. Remember those very important three words whenever you think of the backcountry.
An avalanche beacon, or more accurately a transceiver, helps your ski partners find you if you get caught in an avalanche. It is a small device, not much bigger than a cell phone, that you wear while you’re in the backcountry. It emits a radio signal that can be detected by other transceivers when they are in ‘search’ mode.

Basically, if you or anyone in your group gets buried, everyone else switches their beacons to search mode. Then they start homing in on the signal of the buried skier and narrow the location down as much as possible.
Now the probe and shovel come into play.
An avalanche probe is a long, collapsible pole. After narrowing down the buried skier’s location with beacons, a probe is used to probe the snow (big surprise) and narrow the location down even further.
Time to dig! An avalanche shovel is a collapsible shovel that fits in a backpack. After you locate the buried skier with your probe, you use the shovel to dig them out. You should use a specific technique, but that’s beyond the scope of this article.
There is much, much more to avalanche rescue, and I cover all of this gear and how to use it in more detail in the article Backcountry Skiing for Beginners: Avalanche Safety.
Mobile Phones
Note: there has been some research that shows mobile phones interfering with avalanche transceiver performance. The rule of thumb is that if you bring your phone, leave it turned off until you need it.
If you insist on having your phone on, make sure it’s at least three feet (1 meter) away from your avalanche beacon to minimize the interference. But seriously consider the implication – is having your cell phone on really worth the chance that you might not get found if you get buried?
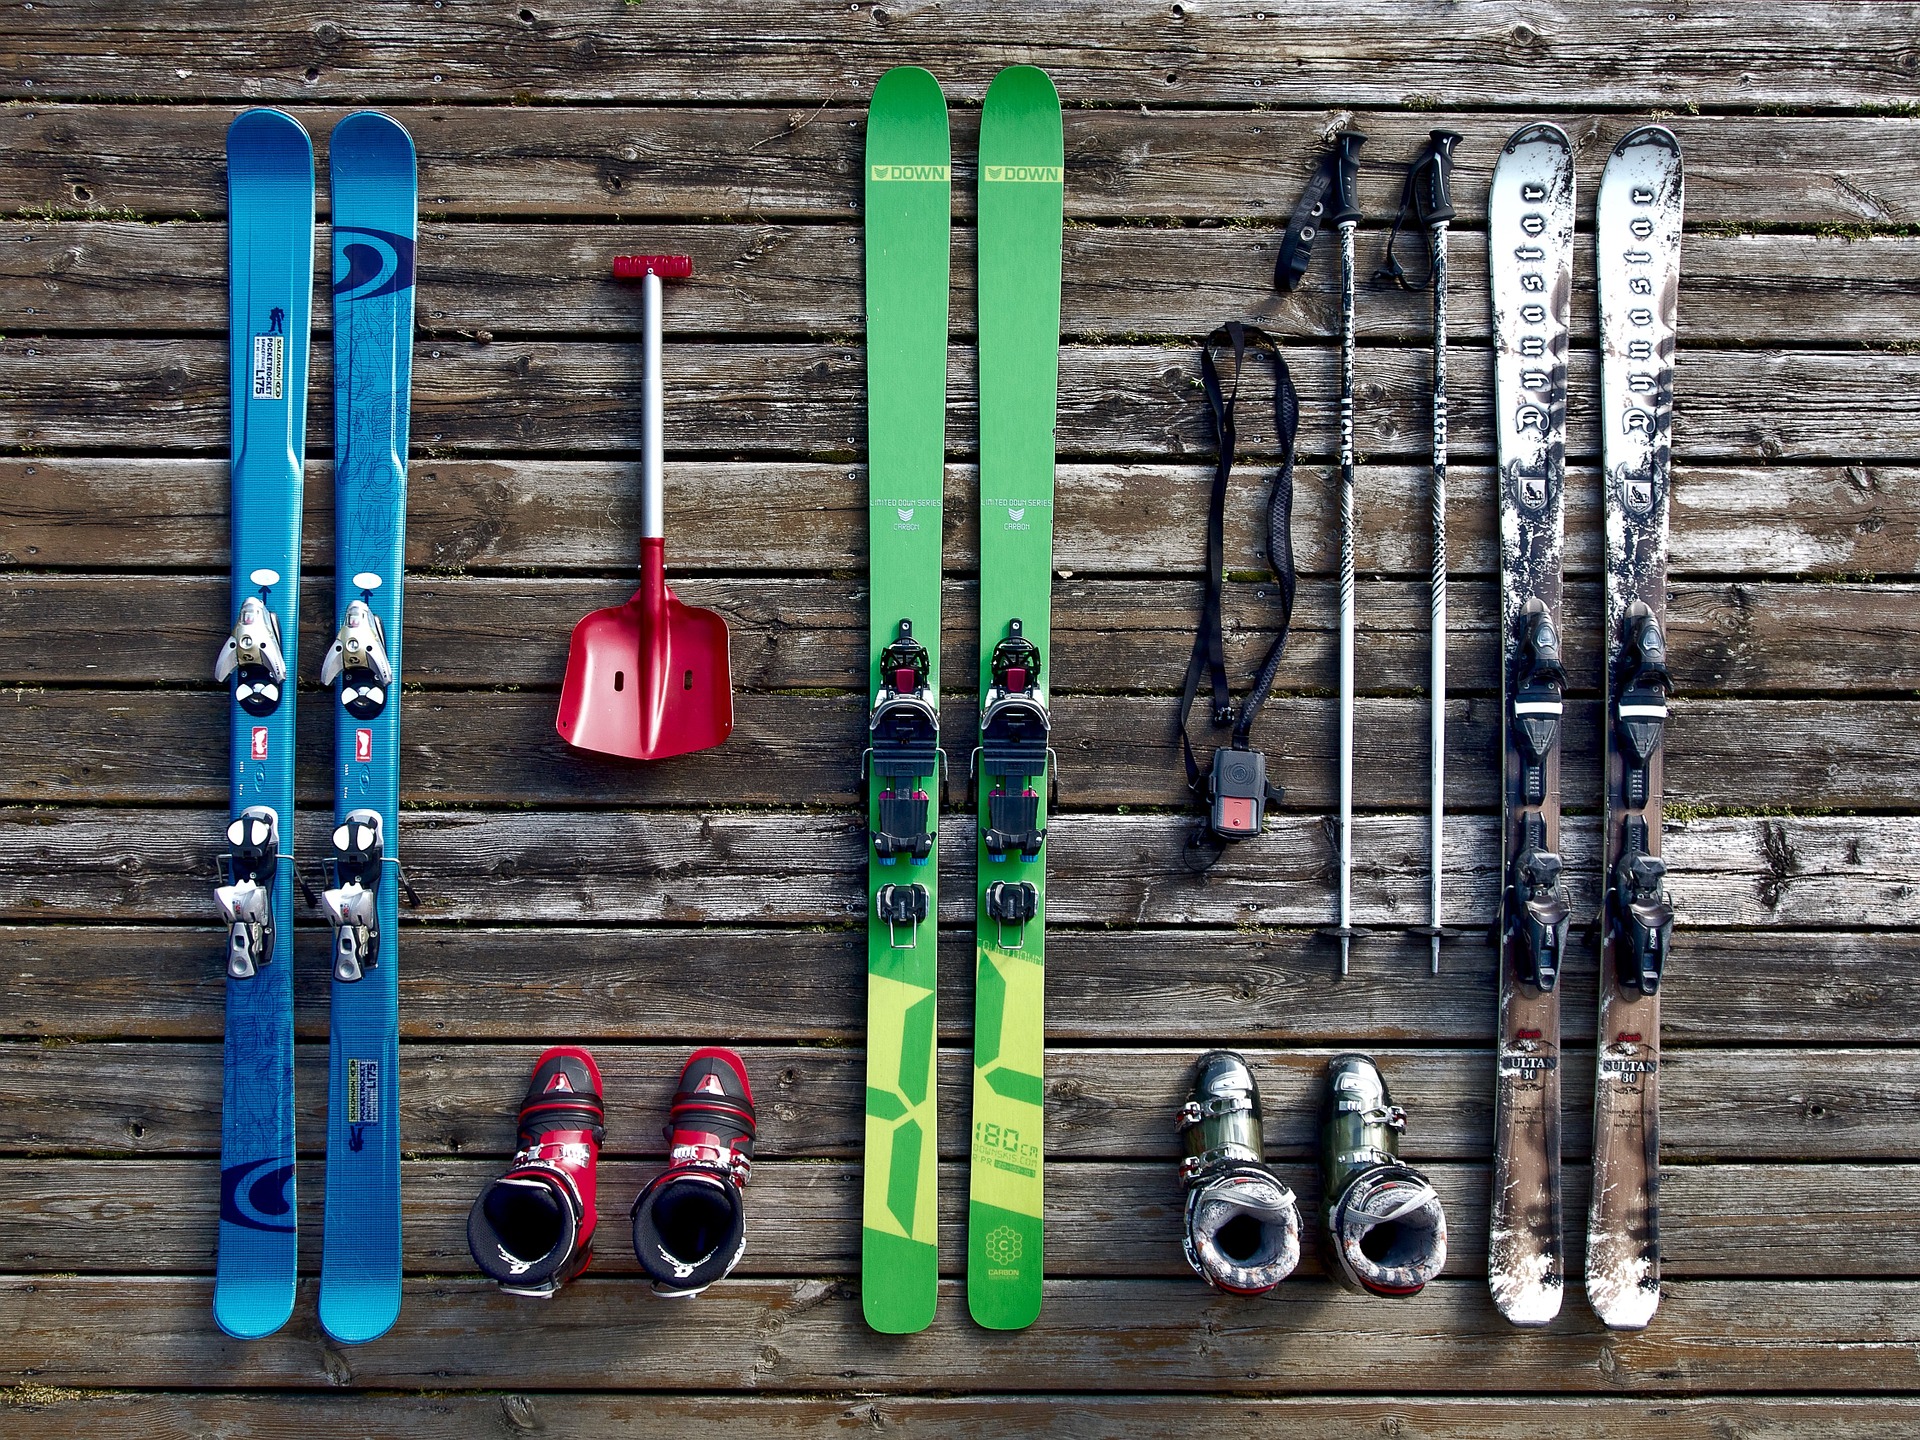
Skis, Boots, Bindings and Poles
Skis
One thing that is very important for you to consider when looking at backcountry gear is the weight. You want to be as light as practically possible when you’re slogging through the snow with skis on your feet.
Backcountry skis and bindings are most often much lighter than their alpine counterparts. If you’re just starting out don’t stress too much about having the lightest gear.
Make sure the skis suit the terrain you’re going to ski. If you expect deep powder, you’ll want a wider pair of skis so you float. For more hard pack conditions, a narrower pair will do just fine.
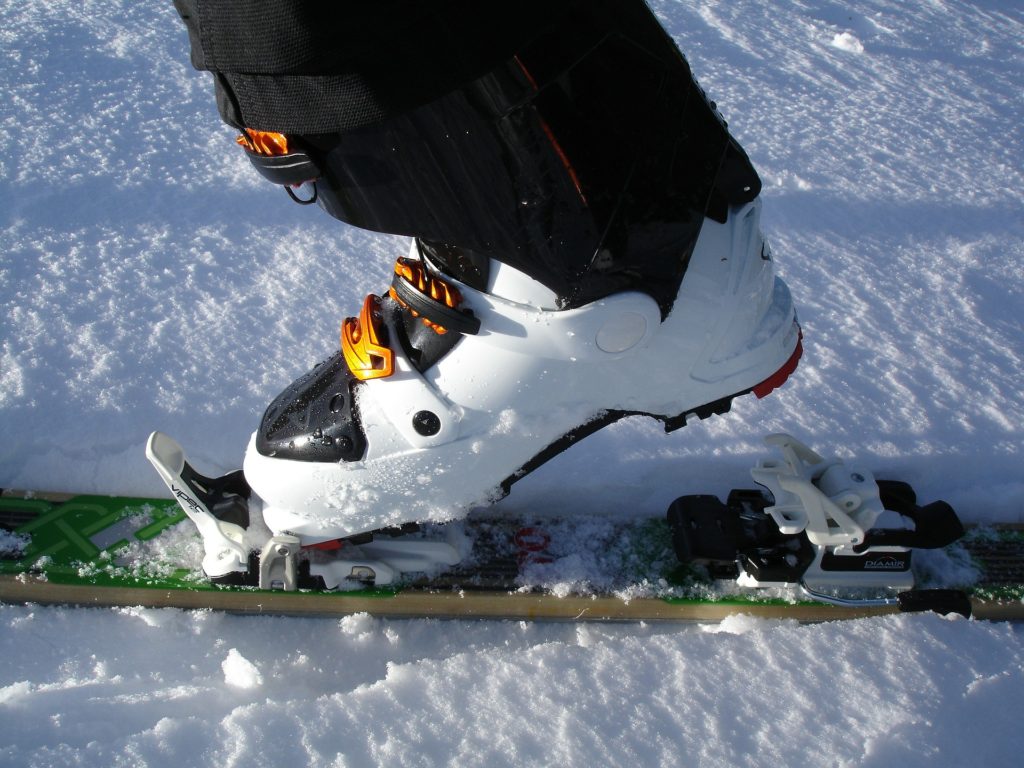
Bindings
Touring bindings are special and very different from alpine bindings. They allow you to lift your heel, just like cross country skiing. The big difference is that you can lock your heel in when it’s time to ski downhill.
There are two main types of touring bindings: frame and tech (or pin) bindings.

Frame bindings look more like an alpine binding and have a metal frame that attaches the toe and heel piece. They’re time-tested and work great, but they’re a fair bit heavier than pin bindings. Diamir Fritschi is probably the most well-known brand of these.
Tech bindings have been around for quite a long time and have experienced a bit of a revolution in recent years. Dynafit was the primary company making tech bindings for years, but recently many companies have hopped on the bandwagon.
This is a good thing for us skiers, as we’re seeing a plethora of different products hit the market.
In any case, frame bindings are easier to use but a bit heavier. Tech bindings are lighter, the stride feels much more natural, but they take some getting used to. They can be a bit fiddly to step into at times.
Bottom line is that either one will suit just fine if you’re starting out, but frame bindings will feel more familiar to an alpine skier.
Boots
As I mentioned above, boots that don’t fit will can lead to a bad time in the backcountry. If you currently have alpine boots that you love, there is nothing wrong with using these to try backcountry skiing.
You’ll have to use frame bindings, since most alpine boots don’t have tech fittings. There is nothing wrong with this, but a proper tech binding and alpine touring boot setup is much lighter.
Alpine touring boots are more widely available than they used to be, but they are still a significant expense. They are lighter than alpine boots and have a ‘hike’ mechanism to allow more movement of the cuff when you’re climbing.
Don’t confuse this with the many pairs of alpine boots that now come with a walk mechanism. This only allows you to be slightly more comfortable stomping around the ski lodge and doesn’t mean you have a set of touring boots.
Poles
Which poles you choose is not too critical, but make sure you have a large enough basket that you won’t punch through deep powder. Generally lighter is better, and you can get collapsible poles that are much easier to strap to your pack, but don’t stress about this too much when you’re starting out.
Climbing Skins
Climbing skins are a critical piece of gear. When buying a pair, ideally you want them to be wide enough to cover the widest part of your ski. This way the entire base of your ski will be covered by the skin, and you’ll have the maximum amount of grip possible.
Skins attach with hooks at the tip and tail and have a slightly sticky surface that sticks to the base of your ski. Usually one end (tip or tail) has a stretchy attachment, and you will attach the other end to the ski first. Pull the skin taught and press it onto the base, working your way toward the stretchy attachment and when you get there, clip it onto your ski.

Be sure to keep the skin glue (sticky side) clean – pack them carefully in your bag. If your skins get covered with debris, they won’t stick to your skis very well and you’ll have a bad time.
Skin savers, also known as cheat sheets, are plastic mesh sheets that come with some brands of skins. You stick the mesh to the glue side of your skins and when you fold them up, the mesh prevents the glue from sticking to itself. This makes pulling your skins apart about a million times easier.
Clothing and Outerwear
For base layers you will want something breathable. You’re going to get hot when you’re climbing, trust me. Merino wool is great – it keeps you warm, doesn’t stink as much as synthetics and wicks sweat away.
If it is wet at all where you will be skiing (think coastal regions or spring skiing), then you’ll want waterproof breathable outer layers. In drier areas you can get away with a more breathable soft shell material.
It’s a great idea to have a warm down jacket in your pack for 2 reasons: to put on whenever you stop and it’s great to have for emergencies. If someone in your party gets injured, they’ll need all the insulation they can get.
A breathable toque or cap and light gloves are good for climbing, and warmer gloves or mitts are a good idea for the descent. Spares are a great idea too.
Food and Water
Bring at least a quart (liter) of water for a short day (and I mean short). If you’re going to be out for more than a couple of hours, you’ll want a quart for every couple of hours you’ll be out there.
A thermos full of hot tea or coffee is very welcome on a cold day, too.
It’s better to have too much water than too little, and keep some in your vehicle for the end of the day.

Trail mix, jerky, meat sticks, dried fruit, etc. are all good snacks. One of my buddies pretty much lives off of frozen pizza in the backcountry, so pretty much anything goes, but the lighter the better. Maximum calories per unit of weight is what you’re going for.
Bringing snacks to share always wins points if you’re out with a new group too.
Emergency Kit
Here are a few items you should always have: bandages, mole skin (for blisters), lighter/matches, flashlight, gauze, emergency blanket, tape
An emergency beacon (InReach, Spot Device, any other kind of satellite PLB) is a great addition. Hopefully at least one person in your group has one and knows how to use it. The more the better.
Other Essentials
You’ll also want to bring goggles, a helmet, sunglasses and sunscreen for sunny days, and your camera for sharing the memories!
Toilet paper is also nice to have…for reasons that I’m sure I don’t have to explain.
Key Component: The Pack
Perhaps the most important piece of any backcountry skier’s gear is the pack. Your pack holds pretty much everything while you’re out exploring the backcountry so you don’t want it to fail and spill your snacks everywhere…or worse.


Size Matters
I realize this joke might be overused, but in this case it’s true. The size of your pack matters. If it’s too small you won’t have room for all of your gear. If it’s too big you’ll probably fill it with stuff that you don’t really need.
For a short day trip you can get away with a 25 liter pack, give or take, but 30-40 liters is a more practical size.
Look for straps on the side or the back of the pack. If you ever need to boot pack (climb in your ski boots) you’ll want to be able to strap your skis to your pack.
Airbag Packs
When looking for a pack, you should definitely consider an avalanche airbag pack. Airbag packs have what is basically a large balloon that inflates when you pull a trigger. The balloon helps keep you on top of the snow if you get caught in a slide.
If you want to know more about how they work, check this article out. I go through some of the best airbag packs on the market here.
They’re significantly more expensive than traditional packs, but add quite a lot of value if you’re going to be doing a lot of travel in avalanche terrain.
Wrap it Up
That’s the end of the backcountry for beginners gear guide. I know there is a lot of material covered here. But this should give you a good idea of what you’ll need to get started.
As I mentioned at the beginning of the article, renting (or borrowing!) is a great way to get your feet wet. Talk to friends, find some shops and get out there!
There are more articles coming that will go more in depth for some of this stuff. For now if you have any gear questions, feel free to leave a comment below and I’ll help you out.
Be safe out there.