How to Layer for Backcountry Skiing
Proper layering will help keep you warm and dry on your backcountry adventures but figuring out the right combination of layers can be a bit tricky. You want to stay cool (but not cold) on the way up. A great day can quickly be ruined by getting all sweaty while hiking and then getting chilled because you’re damp. Layering properly can keep the sweating in check and help keep you warm while resting and skiing down.
I typically run pretty hot and have learned a few tricks over the years to keep cool and dry, but this article applies to people who are always cold too. You’ll just need more/thicker layers!
A general rule of thumb is that cotton should be avoided and wool is your friend. Cotton retains moisture and bleeds heat while wool wicks moisture and keeps you warm. Read on to find out how to layer for backcountry skiing.
Let’s start with what should go on your feet and work our way up from there.
Feet
Keeping your feet warm and dry is crucial to enjoying your trip in the backcountry. Cold feet can quickly lead to a full body chill and this is tough to recover from.
Socks: merino wool or a merino wool blend is perfect material for socks. Remember the rule of thumb: no cotton! I like to use a fairly thin sock for touring, but if you get cold feet (and you have room in your boots) a thicker sock might work better for you.
Two of my go-to socks for backcountry skiing are the Smartwool Ph.D (100% merino) and the Lorpen T3 (a merino/synthetic blend). Both of these socks come in a variety of weights and do a great job of keeping my feet cool and dry. They’re also pretty long, so they help keep my calves warm too.

Legs
There are three things you’ll want to consider for your lower body – two base layers and an outer layer. The base layers will breathe but still keep you warm while the outer layer will protect you from the elements.
Base layer (underwear): remember rule number 1 – no cotton. Whatever type of athletic underwear you prefer will work fine as long as it’s a material that doesn’t hold in moisture. Think comfort here. I’ve recently been using some bamboo boxer briefs from Amazon and have been really liking them (TMI? Meh.) I think I prefer these to the underarmour synthetics I usually wear, but both work well.
Base layer (long underwear): the thickness of your second base layer may vary depending on the temperature, but it should always be breathable and wick moisture. Merino wool is a great option here (as always for base and mid-layers), but synthetics can work just fine. Smartwool, Icebreaker, Arc’teryx and many more companies make great options for ski touring mid layers.

If you find your butt or thighs get cold, try wearing a pair of shorts over your base layer (under your shell). I kid you not, this extra half layer really helps on cold days but isn’t overwhelmingly hot.
Outer layer: your outer layer has an entirely different job than your base and mid layers. This layer will protect you from the wind and water/snow. What you’re looking for is a breathable and weatherproof pair of shell pants, either traditional pants or bibs for extra warmth. If you ski tour in an area where the snow is quite dry, another option is soft shell pants. These breathe very well but typically aren’t quite as waterproof or windproof as hard shell pants.
Another thing to look for is adequate venting. Shell pants that are designed for ski touring usually have a lot of vents to help you regulate temperature. Leave them open when you’re skinning to keep your temperature down.
I’ve been using the Flylow Smythe Bib Pants this season and have really been liking them so far. They have great venting, tons of pockets, and the material keeps the elements out while staying breathable.

Upper Body
This is the area where you’ll be adding or removing layers throughout the day to keep cool or warm. While skinning on a warmish day you might only need a base layer, but during transitions you’ll want to put on another layer or two to stay warm. Finally, when it’s time to ski down you’ll throw on a shell outer layer to keep out the wind and snow.
Base layer: a long sleeve merino wool base layer is your best option here. For colder temperatures go with a thicker base layer but if it’s warm you might even opt for a short-sleeved merino layer. This is a great setup for spring touring and occasionally on warmish days mid-season I’ll skin with a short-sleeve base layer and a light shell to block the wind.
One bonus for your base layer is getting one with a hood that you can use to keep your head warm while skinning. Arc’teryx, Patagonia, Norrona and a few others have started making hooded base layers and I’m betting that they’ll become more common.

Mid layer: depending on the temperature and goal for the day, this layer is somewhat optional. Your mid layer should be light enough that it will fit under a puffy (see below) during transitions. It should be at least somewhat wind and water resistant in case you want to use it as a ‘shell’ over your base layer while skinning on a cold day. Breathability is key here as well.
One good option would be a DWR (durable water repellent) treated down or synthetic sweater/hoodie like the Patagonio Nano Puff. Another choice might be a light, DWR treated fleece or soft shell jacket like the Arc’teryx Kyanite Hooded Jacket.
Puffy: a big puffy jacket is the best thing you can have in your pack on cold days. When you get to the top and need a breather, it’s great to be able to throw on a warm puffy jacket over whatever layers you were skinning in. Down is your friend here, as it’s very packable and light. A DWR treated down jacket is a good idea as down doesn’t insulate at all when it gets wet.
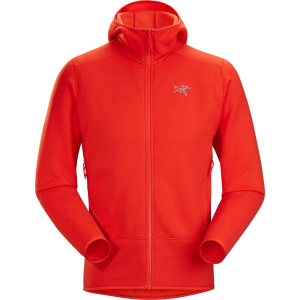
I’ve been using a Helly Hansen Odin Veor puffy for the past couple of seasons, but have also been eyeing up the Arc’teryx Cerium LT Hoody (pictured below). A friend of mine has this and it’s crazy warm for the weight. When looking for a puffy, pay attention to how warm it is, how packable it is, and how much it weighs.

Shell Jacket: when you’re ready for the descent (or if it’s really windy up top), it’s time to throw on your shell jacket. This outer layer, like your shell pants, is designed to block the wind and keep moisture out. A good shell will be made from a breathable material to help keep you cool if you need to wear it while skinning. On windy days I’ll sometimes skin with my shell on, usually with the vents wide open unless it’s really cold.
This season I’ve been using a Flylow Cooper Jacket, which is the mate to the Smythe Bibs I mentioned above. It’s the same weatherproof/breathable material as the Smythe pants, has great vents and lots of pockets. Stay tuned for a full review of both. When looking for a shell, look for one that is windproof (and waterproof if you’ll ever see wet snow/rain) and breathable.

Gore-tex has long been the industry standard for permeable membranes, but many companies (including Flylow) are making very comparable custom materials. Other things to look for in a good shell are pit zips to let out the heat, pocket locations that are convenient when wearing a pack, and a hood – preferably one that will fit over a helmet.
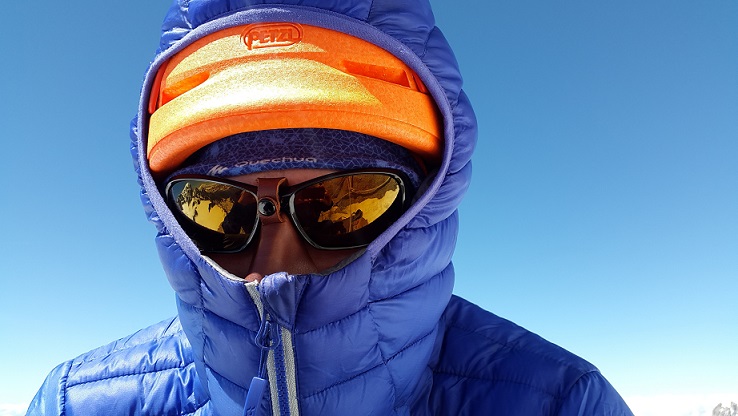
Head
This one is pretty easy. If you can, wear a ball cap while skinning up. If your ears get cold, put your hood up or use a Buff as a head sock to keep warm. A Buff is a great thing to have in your pack since it’s so versatile – I’ve said this before, but they’re like neck warmers on steroids.

On colder days I like to wear a really light winter hat – the kind that are designed for winter running. They breathe well but still keep you a bit protected from the wind.
Keep your helmet strapped to your pack unless there is significant overhead danger. I also like to throw in a heavier winter hat just in case, but rarely actually use it.
Hands
When you’re skinning, you’ll want a light and breathable pair of gloves so your hands don’t get sweaty. Some people don’t have that problem and can wear the same pair of mitts all day long (looking at you Mrs. HikeForPow) but I sure can’t. I bring all kinds of spare gloves. If you get sweaty hands when you’re working hard, I would suggest doing the same – damp gloves on a cold day is brutal.

The Black Diamond gloves pictured above are a perfect example of gloves for skinning. Light, breathable but still somewhat water resistant to shed snow. I also carry my ski gloves and keep a pair of super-warm mitts buried in the bottom of my pack for emergencies.
There are quite a few models of battery powered heated gloves available now, but I would suggest staying away from them for backcountry skiing. If you come to rely on them and the batteries fail or die sooner than expected, you could be in trouble. They also tend to have less insulation than regular gloves, so when the batteries die they aren’t as warm. If you really need these, keep an extra pair of warm mitts with you.
Closing Thoughts
These are some tips on how to layer for backcountry skiing that have worked for me throughout the years, but I learn something new every season. Also, what works for one person won’t work for everyone so don’t be afraid to experiment a bit.
Remember, you can always add more layers if you get cold but only if you have them in your bag! The old mantra ‘be bold, start cold’ is a good one to remember – if you’re a bit cool when you start skinning, don’t worry. You’ll heat up soon enough.